
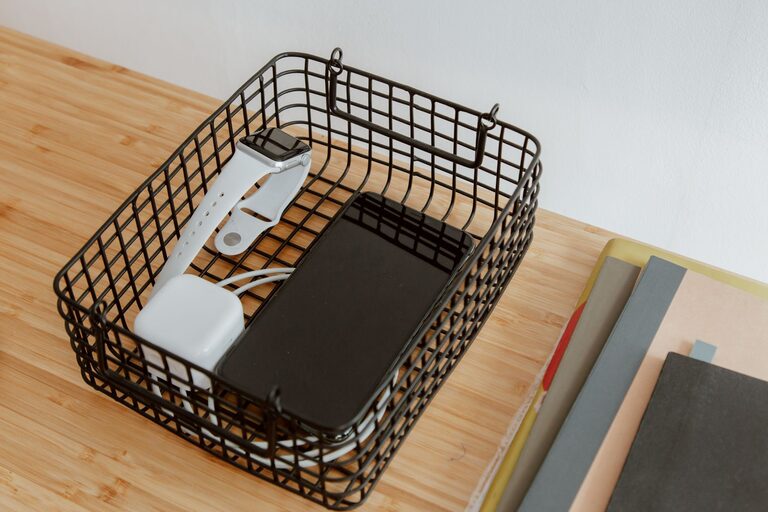
A dedicated charging station makes it easier to keep phones, tablets, watches, headphones, and other devices ready to use. Instead of searching for open outlets or untangling cables, you can place everything in one convenient location.
The best charging station does more than hold devices. It should be safe, easy to reach, simple to maintain, and flexible enough to support the devices you use every day. With a few basic supplies and a little planning, you can create one for a desk, kitchen counter, nightstand, or shared family area.
Choose the Right Location
Start by choosing a location that fits your daily routine. A charging station works best near an existing wall outlet and away from areas where water, heat, or heavy foot traffic could create problems.
Good locations include:
– A home office desk
– A kitchen counter away from the sink
– An entryway table
– A bedside table
– A shelf in a shared family room
– A workbench or hobby area
Think about who will use the station and which devices need to be charged. A family charging station may need more space and longer cables than a personal station beside your bed.
Avoid placing the station where cables can cross walkways, become caught in drawers, or hang within reach of small children or pets. Keep it on a stable surface that will not move when devices are connected or removed.
Make a List of the Devices You Use
Before buying accessories, list the devices you plan to charge. This helps you avoid purchasing unnecessary equipment and makes it easier to choose the correct number of ports.
Your list might include:
– Smartphones
– Tablets
– Smartwatches
– Wireless headphones
– E readers
– Cameras
– Portable game systems
– Power banks
– Keyboards or other rechargeable accessories
Check the charging connectors used by each device. Some may use USB C, while others may require a different connector or a device specific cable. Also note whether any device needs a dedicated charger rather than a shared USB port.
If you use laptops or other high power devices, check their charging requirements before connecting them to a multiport charger. The original charger or a compatible replacement may be the best option.
Select a Suitable Power Source
A charging station usually needs a wall outlet, power strip, USB charging hub, or combination of these items. Choose products from reputable manufacturers and look for clear safety information, appropriate power ratings, and built in protection features.
A USB charging hub can reduce clutter by allowing several cables to connect to one unit. Choose a model with enough ports for your current needs, plus one or two extra ports for future devices.
When using a power strip:
– Select one with enough outlets for your equipment
– Check its maximum load rating
– Use a model with overload protection
– Keep it on a hard, stable surface
– Do not connect one power strip to another
– Replace it if the cord or housing is damaged
Avoid filling every available port without checking the total power demand. Some devices use much more power than others, and a crowded station can generate excess heat. If you are unsure whether your setup is appropriate, ask a qualified electrician or follow the instructions provided with the equipment.
Organize the Cables
Cable management is one of the most important parts of a useful charging station. Loose cables quickly become tangled, difficult to identify, and easy to pull from the outlet.
Start by measuring the distance between the power source and each device. Use cables that are long enough to be practical but not so long that they create loops across the surface.
Helpful cable management items include:
– Cable clips
– Hook and loop straps
– Adhesive cable holders
– Cable sleeves
– Small labels
– A cable box or tray
Attach clips along the back or edge of the station to guide each cable. Keep the connectors in a consistent position so they are easy to find. For a shared station, label cables by device or connector type.
Do not bend cables sharply near the connector. Repeated bending can damage the internal wires. Replace cables that show fraying, exposed wires, loose connectors, or other signs of wear.
Add a Tray or Dock
A tray, rack, or charging dock gives each device a designated place. It also helps prevent phones and tablets from sliding off the edge of a desk or counter.
Choose a holder based on the devices you plan to charge. A simple tray may work for phones and accessories, while vertical slots are more useful for tablets or multiple devices.
Look for a design that:
– Keeps screens visible
– Allows cables to connect easily
– Has a stable, non slip base
– Provides enough space between devices
– Is easy to clean
– Does not block ventilation openings
If you use a wooden box, basket, or decorative container, make sure it does not trap heat. Avoid covering chargers or placing them under piles of fabric, paper, or other materials.
Keep the Station Safe
Safety should be part of the design from the beginning. Place the station in a dry area with good airflow. Do not charge devices under blankets, inside closed bags, or in other places where heat cannot escape.
Use the charger and cable recommended by the device manufacturer whenever possible. Check the instructions if a device requires a specific power output or charging standard.
Follow these basic guidelines:
– Keep chargers away from water
– Do not use damaged cords
– Do not cover power adapters
– Unplug equipment that becomes unusually hot
– Keep charging equipment away from children and pets
– Avoid using outlets that are loose or damaged
– Follow all manufacturer instructions
A small amount of warmth may be normal during charging, but a charger that becomes very hot, produces a smell, makes unusual sounds, or shows visible damage should be disconnected and replaced.
Create a Simple Routine
A charging station stays useful when everyone follows the same routine. Decide when devices should be connected, such as after school, at the end of the workday, or before bedtime.
You can improve the routine by:
– Keeping one cable for each regular device
– Returning devices to the same position
– Removing fully charged devices when practical
– Checking cables weekly
– Wiping dust from the station regularly
– Reviewing unused cables every few months
For a shared station, consider adding a small label or sign that shows where each device belongs. This prevents cables from being moved and helps family members keep the area organized.
Plan for Future Devices
Technology changes over time, so leave some room for new equipment. An extra charging port and a few spare cable clips can make future updates easier.
Avoid buying a large collection of cables before you need them. Instead, add accessories as your device collection changes. Store spare cables in a labeled box rather than leaving them connected to the charging station.
If you move the station to a new location, check the outlet, cable length, and surface stability again. A setup that works well on a desk may not be suitable for a kitchen counter or nightstand.
Final Checklist
Before using your new charging station, confirm that:
– The station is near a suitable outlet
– Devices are supported by the selected chargers
– Cables are labeled and secured
– The power source is not overloaded
– Chargers have room for airflow
– The surface is dry and stable
– Damaged cables have been removed
– Devices have a clear place to rest
A well-planned charging station keeps everyday devices ready without adding clutter. By choosing a practical location, using compatible equipment, organizing cables, and allowing enough ventilation, you can create a setup that is convenient, tidy, and easy to maintain.